很多小伙伴在使用microsoft edge的时候,想知道怎么安装拓展插件,下面小编就为大家分享microsoft edge安装拓展插件方法,感兴趣的小伙伴不要错过哦!
microsoft edge怎么安装拓展插件?microsoft edge安装拓展插件方法
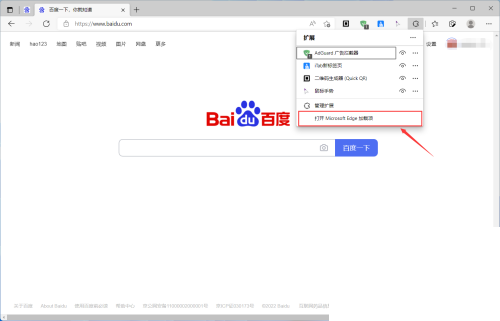
1、首先启动microsoft edge,点击【拓展】-【打开microsoft edge加载页】。
2、然后在搜索框输入想要安装的插件名称,点击回车键搜索。
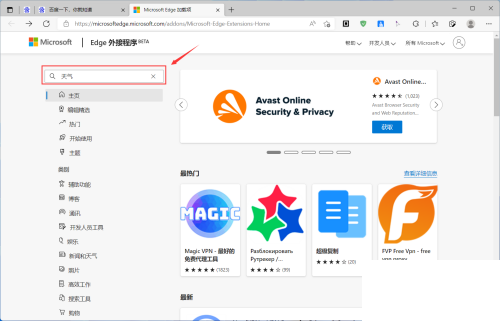
3、接着在搜索结果中找到想要安装的插件,点击【获取】。

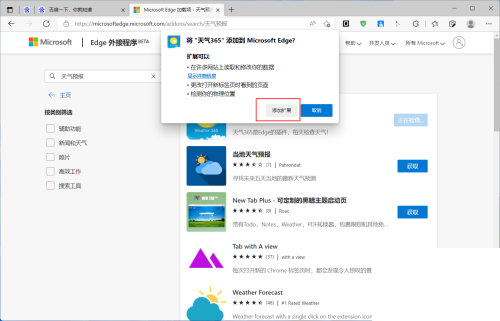
4、最后在确认弹窗中点击【添加拓展】等待安装完成即可。
以上这篇文章就是microsoft edge安装拓展插件的步骤内容,有需要的小伙伴快来学习一下吧!
收藏
点赞